Samsung Galaxy devices with Jelly Bean operating system have different shooting modes for clicking pictures. These were first introduced with Galaxy Camera which later on came for other devices as well running on 4.1 Jelly Bean operating system.

Every one knows how to shoot pictures with auto-focus and regular filter. Just hit the Camera application and click the picture, thats it but most of the smartphone users don’t know what their smartphone camera can do. One such thing is HDR photography. HDR stands for High-Dynamic-Range which is includes a set of methods in imaging algorithms to capture pictures with greater dynamic range between the lightest and the darkest areas of an image. In any light you might observe the object near the source appears to be darkened as compared to that which is far away. The picture when clicked in normal mode tends to make it even worse. In order to get rich colors and this wide range depending on the amount of light entering the aperture we use the HDR shooting mode especially in day light.
In order to click HDR images on Samsung Galaxy devices with Jelly Bean 4.1 and above operating system you can follow these simple steps mentioned below.
- Launch Camera application
- Tap on MODE button
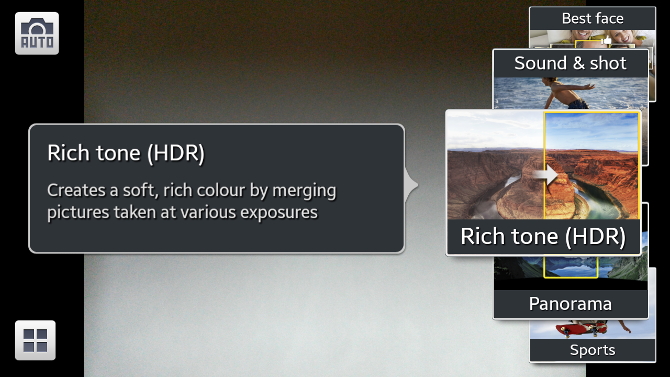
- Scroll to the different modes. You can apply any of them to see what they can do.
- For HDR select Rich Tone (HDR)
- Click your picture
Now find your picture and see the difference between the AUTO mode and HDR mode. In case of any queries feel free to contact us.