How To

[How-to] Enable Lock Screen Widgets On TouchWiz

Samsung’s TouchWiz is a custom UI layering on the Android mobile operating system. The latest 4.2.2 update on some of the Galaxy devices have been started rolling out and some of the devices ship with 4.2.2 installed. Touchwiz no wonder is just a layering on Android but it still changes a lot of things which make it different from the vanilla rom which is released by Google.

lockscreen-widgets-touchwiz-4

Android 4.2.2 has a prominent feature of lock screen widgets which seem to be very useful for some users. TouchWiz does not enables this by default but instead we have to change it in the settings in order to activate lock screen widgets. Below are the steps to be followed to enable the lock screen widgets on Samsung TouchWiz.

  1. Go to Settings
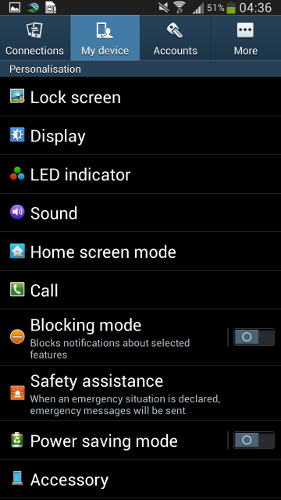
  2. Switch to ‘My Device’ tab
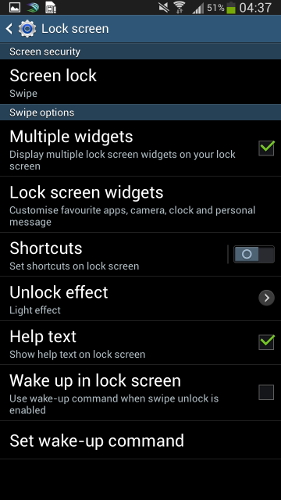
  3. Tap on the Lock Screen option
  4. Check Multiple Widgets

lockscreen-widgets-touchwiz-1     lockscreen-widgets-touchwiz-2

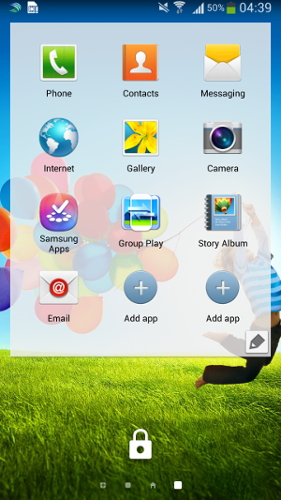
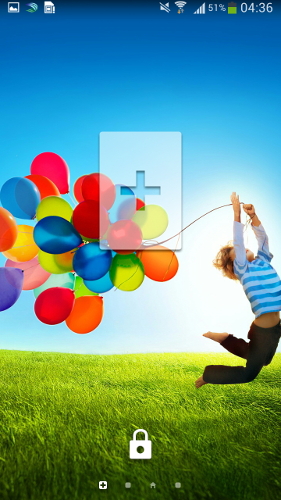
Now your lock screen widgets are activated and you can now swipe on the lock screen to change lock screen widgets. To add lock screen widgets swipe left on the lock screen and select more by tapping on the ‘+’ icon.

lockscreen-widgets-touchwiz-3

[How-to] Disable Chat Head on Facebook Messenger For Android

If you all remember Facebook had launched Facebook Home for Android and HTC First the Facebook dedicated phone which though resulted in a complete failure. The basic idea behind all this was to take Facebook experience to a new level with Cover Feed and Chat heads. Chat heads came to Facebook Messenger with the update to every Android device but Facebook Home which was the Facebook dedicated launcher which has Cover Feed was limited to some devices only.

Facebook Messenger Chat Heads

Chat heads are the floating popup bubbles which has the contact’s display picture as the icon image and expands to full messenger on tapping. This looks very cool on the device giving a different experience to coversations. We think this really counts in innovation unleashing the power of Android and replacing notifications for Facebook Messages with chatheads. Facebook Messenger also overrides the default messaging app and can be used replacing it which adds on to its use case.

Facebook Messenger Chat Heads

These popups can be irritating for some in the case when they receive so many notifications. Facebook does not force you to use this feature instead if you are not comfortable you always have the option to revert back to the original notifications. To get back the original notifications follow our guide below

  1. Open Facebook Messenger application
  2. Tap Menu key and select Settings > Notifications
  3. Uncheck Chat Heads and you are back at your old notification style.

[How-to] Backup your SMS and Call Log to Gmail

Android as we know is owned by Google therefore it integrates Google services most effectively compared to any other mobile operating system. Android has the best Google Apps experience but when it comes to fragmentation you might not disagree with the complaints.

Android SMS Backup

Image Source : The Mobile Indian

There are times when you have to factory reset your Android device, reason may be some performance issues or just to wipe out your data. Every operating system has this factory reset option which deletes every single trace of data on your device so you should backup important files before proceeding with the factory reset. Media content and Documents can be stored on cloud storage or external memory but what about Call logs and Text Messages?

SMS Backup +

Android being an open source operating system obviously has this capability which let users extract each and each part of their data from the device and save it accordingly. There are two ways to store your call log and messages : one is backup and save it as .xls which can be restored anytime on any device or backup to your Gmail which when accessed can restore it whenever the user wants. There is an application developed for each purpose and we have a step-by-step guide below to backup your sms and call log on Gmail which can taken as a reference.

  1. Download SMS backup + application from the Play Store
  2. Open the application and sign in with your Google Account
  3. Tap on ‘Backup’ button on the screen
  4. It might take sometime depending on the number of entries
  5. Now your backup is ready and it can be viewed on Gmail under SMS and Call Log labels on mailbox.

[How-To] Turn Off Service Messages On Android

Service messages also known as Cell Broadcast Messages or Mobile Broadcast are a part of GSM standard. They are there on the mobile phones since mobile network has born. Cell Broadcast is designed for simultaneous delivery of messages to multiple users in a specified area. These are generally unwanted by the users because nowadays network providers use them to spam user’s inbox. They are usually pop up messages which have dialog box and tend to irritate users but no worries we heard you. Here is the step-by-step guide on how to turn off service messages on Android.

Android Service Message

For Touchwiz:

  1. Open Messages
  2. Tap the Menu Key and select Settings.
  3. Uncheck Push Messages.

For Stock Android:

  1. Open Messages
  2. Expand the Action Overlay Bar
  3. Select Mobile Broadcasts
  4. Expand the Action Overlay Bar again and select Settings
  5. Uncheck all the options.

For HTC Sense:

  1. Open Settings
  2. Select Call
  3. Select Other Call
  4. Select Cell Broadcast and disable.

That’s it. Now all your push messages from the network operator shall be discontinued and you will not have to face those constantly irritating popups. In case of any questions leave us a comment below or contact us on our Facebook Page or Twitter handle @idigestindia.

[How-to] Switch To US PlayStore Permanently

Android developers might release a lot of applications for the mobile operating system but when it comes to availability they restrict themselves to US region only. You might have observed some of the applications do not show up in search results and when you purposely hunt them on Google and the links redirect back to the play store which end up showing the error message “This item is not available in your country”. This is annoying because even Google knows that this won’t stop us from installing the application Android can’t be much restricted but still they do such things. US region being the hub for all such services has a lot more to offer its residents than only other country in the world. Therefore we bring this guide for users who wish to exploit some of these opportunities.

Not available in country error

  1. Install HideMan application from your Google Play Store.
  2. After installing the application, select United States.
  3. Uninstall Google Play Store updates and Play Services updates from the Application Manager.
  4. After uninstalling the updates, launch HideMan and start VPN by selecting US region.
  5. Launch Play Store and wait till it detects the internet connection and then your US Play Store will be ready.
  6. Now you can stop VPN by terminating HideMan application because Play Store has downloaded the region specific files and has changed your region to US.

hideman

Now you can download any US region specific application directly from the Play Store without any issues and enjoy the features which earlier you could not.

[How-to] Share files using FTP on Android

Android is the most versatile mobile operating system. It has loads of functionality which other mobile operating system restricts. FTP which is the acronym for file transfer protocol is the popular way to exchange data between two machines. Web hosting generally use this or HTTP for file transfer. Android being a complete mobile os supports this protocol as well but needs a client to unleash its productivity. Matching the needs we found a suitable app for this purpose called as ES File Explorer.

ES File Manager

The application itself is a complete package which completely manages files and additionally has support for FTP, LAN and cloud storage as well. We shall for now focus on how to share files via FTP. Below is the step-by-step guide on how to make your Android device as a FTP client and use a different machine to extract files from it.

  • Download ES File Manager application from Google Play Store.
  • Tap the globe icon on the top left corner.
  • You shall see a dropdown menu, expand network and select FTP.
  • Make sure you are connected on a WiFi network.
  • Tap on ‘Turn on’ button.
  • Your FTP server is now ready.
  • On your computer or any other device use the IP address as shown on the screen with the port number after ‘:’ on any FTP client like FileZilla.
  • You can also type the address exactly in any browser or file manager on your machine to access the files directly.

ES File Manager

FTP gives you the access to exchange data that is you can add and delete files from the Android device easily that too wireless. Therefore this can be an alternative for users using OS X or linux which don’t have MTP support.

[How-To] Change App Launcher On Android

Android being an Open source project has its pros and cons with pros dominating the cons. Open source projects have this great advantage over that of proprietary that anyone who wishes can fork this project and can improve or develop different apps, tools and tweaks for the operating system. As a result Android operating system has number of applications that can change the functionality of the operating system in the desired manner. For example, if you are fond of stock UI and have Samsung, or a LG or any other device you can too get some of the UI layering on your handset or tablet with minimal tweaking.

Smart launcher
Image source : Android Beat

Nova launcher, Apex launcher, Holo launcher and many more are simple applications which can be found on Play Store which make some changes in the basic UI layering plus adding advanced features. These launchers change the way your home screen and app drawer behave and look along with some additional features like gestures, home screen lock, etc. Its very easy to get these tweaks on your device because they don’t require any hacks.
To install launcher on your launcher simply follow the steps below.

  1. Decide which launcher do you want on your Android device. Some of the options being Nova launcher, Apex launcher, Smart launcher, etc.
  2. Search for the launcher on the Google Play Store
  3. Install the application.
  4. Now your launcher has been installed. Press the Home key and Select that launcher as Default.
  5. Remove the previous launcher from RAM making it available for further use.

Nova laucher

In case you want your stock launcher back, go to Settings->Application Manager->All Applications->Launcher Name->Clear Defaults. Still left with any doubts?