Tag Archive for Tablet

Lenovo Launches 5 Tablets– A1000 Android With Calling Priced At Rs. 8999 Only

Lenovo India, which is already very active in computing devices space in India with their Desktops, Laptops, All in One and recently launched Smartphones has not entered the low cost tablet space with the Lenovo A1000 Android Tablet with 7 inch display and calling feature. The A1000 is decently loaded when it comes to specifications and features and offers nice build quality at appealing price point of Rs. 8999 only.

Lenovo has also launched 4 more tablets along with it across portfolio including- Lenovo A3000, S6000, ThinkPad Tablet 2, IdeaPad Lynx K3011. Lets have a more detailed look at each of these products.

[How-to] Backup your SMS and Call Log to Gmail

Android as we know is owned by Google therefore it integrates Google services most effectively compared to any other mobile operating system. Android has the best Google Apps experience but when it comes to fragmentation you might not disagree with the complaints.

Android SMS Backup

Image Source : The Mobile Indian

There are times when you have to factory reset your Android device, reason may be some performance issues or just to wipe out your data. Every operating system has this factory reset option which deletes every single trace of data on your device so you should backup important files before proceeding with the factory reset. Media content and Documents can be stored on cloud storage or external memory but what about Call logs and Text Messages?

SMS Backup +

Android being an open source operating system obviously has this capability which let users extract each and each part of their data from the device and save it accordingly. There are two ways to store your call log and messages : one is backup and save it as .xls which can be restored anytime on any device or backup to your Gmail which when accessed can restore it whenever the user wants. There is an application developed for each purpose and we have a step-by-step guide below to backup your sms and call log on Gmail which can taken as a reference.

  1. Download SMS backup + application from the Play Store
  2. Open the application and sign in with your Google Account
  3. Tap on ‘Backup’ button on the screen
  4. It might take sometime depending on the number of entries
  5. Now your backup is ready and it can be viewed on Gmail under SMS and Call Log labels on mailbox.

[How-to] Share files using FTP on Android

Android is the most versatile mobile operating system. It has loads of functionality which other mobile operating system restricts. FTP which is the acronym for file transfer protocol is the popular way to exchange data between two machines. Web hosting generally use this or HTTP for file transfer. Android being a complete mobile os supports this protocol as well but needs a client to unleash its productivity. Matching the needs we found a suitable app for this purpose called as ES File Explorer.

ES File Manager

The application itself is a complete package which completely manages files and additionally has support for FTP, LAN and cloud storage as well. We shall for now focus on how to share files via FTP. Below is the step-by-step guide on how to make your Android device as a FTP client and use a different machine to extract files from it.

  • Download ES File Manager application from Google Play Store.
  • Tap the globe icon on the top left corner.
  • You shall see a dropdown menu, expand network and select FTP.
  • Make sure you are connected on a WiFi network.
  • Tap on ‘Turn on’ button.
  • Your FTP server is now ready.
  • On your computer or any other device use the IP address as shown on the screen with the port number after ‘:’ on any FTP client like FileZilla.
  • You can also type the address exactly in any browser or file manager on your machine to access the files directly.

ES File Manager

FTP gives you the access to exchange data that is you can add and delete files from the Android device easily that too wireless. Therefore this can be an alternative for users using OS X or linux which don’t have MTP support.

Asus Upgraded Variant of FonePad Now Goes Online For Rs. 17,999

Few months back Asus launched the FonePad tablet in India for 15,999 with Intel Atom Z2420 1.2 GHz processor with 1GB RAM and 8GB internal memory which can be expanded further via microSD card up to 32GB as its technical specifications. Recently Asus refreshed this FonePad for markets like India with better specs and more memory which appeared online on e-commerce websites for Rs. 17,999.

Asus FonePad

This refreshed variant includes a 7-inch LED display offering 1280×800 pixels resolution same as that on the original model but they have upgraded the chipset from 1.2GHz Intel Atom Z2420 to the 1.6GHz Intel Atom Z2460 which has the same PowerVR SGX540 GPU and 1GB of RAM. It also comes with voice-calling support on 2G and 3G cellular network. On the software front, the tablet runs on the Android 4.1 Jelly Bean out of the box but can be upgraded to version 4.2 later when the update is available. Apart from this one major change is in the internal memory which was 8GB earlier and now has been boosted to 32GB. So users can install a 32GB microSD card slot and get up to 64GB storage on this tablet. Other features remain the same including 3-megapixel rear camera, 1.2-megapixel front facing camera, 4,270mAh battery, and Wi-Fi, Bluetooth support.

Specifications:

  • 7inch 1280×710 pixels resolution IPS display
  • Intel Atom Z2460 chipset with 1.6 GHz processor
  • 1GB RAM
  • PowerVR SGX540 GPU
  • 32GB internal memory
  • microSD card expandble option
  • WiFi/3G/Bluetooth support
  • 2G with voice calling
  • 4,270 mAh non-removable battery
  • Micro sim card slot

Asus FonePad
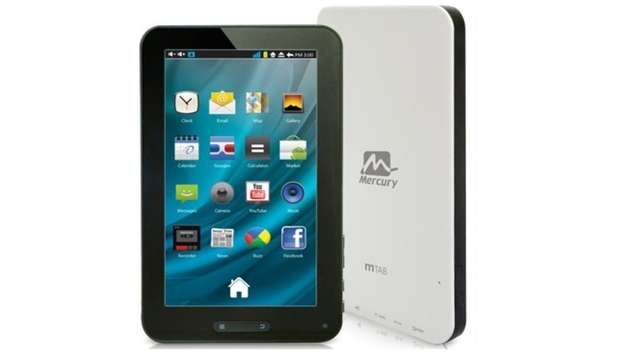
Image Source : Indiatimes

Comparison

Comparing with the recently launched Samsung Galaxy Tab 3 in India this might look like a deal with better specifications but the user base and believe in the brand shall make a difference. Let’s see what Asus can do.

[How-To] Change App Launcher On Android

Android being an Open source project has its pros and cons with pros dominating the cons. Open source projects have this great advantage over that of proprietary that anyone who wishes can fork this project and can improve or develop different apps, tools and tweaks for the operating system. As a result Android operating system has number of applications that can change the functionality of the operating system in the desired manner. For example, if you are fond of stock UI and have Samsung, or a LG or any other device you can too get some of the UI layering on your handset or tablet with minimal tweaking.

Smart launcher
Image source : Android Beat

Nova launcher, Apex launcher, Holo launcher and many more are simple applications which can be found on Play Store which make some changes in the basic UI layering plus adding advanced features. These launchers change the way your home screen and app drawer behave and look along with some additional features like gestures, home screen lock, etc. Its very easy to get these tweaks on your device because they don’t require any hacks.
To install launcher on your launcher simply follow the steps below.

  1. Decide which launcher do you want on your Android device. Some of the options being Nova launcher, Apex launcher, Smart launcher, etc.
  2. Search for the launcher on the Google Play Store
  3. Install the application.
  4. Now your launcher has been installed. Press the Home key and Select that launcher as Default.
  5. Remove the previous launcher from RAM making it available for further use.

Nova laucher

In case you want your stock launcher back, go to Settings->Application Manager->All Applications->Launcher Name->Clear Defaults. Still left with any doubts?